Best Corn Salad Ever!

Best Corn Salad Ever!

image

Summer is here and I love me some good ole summer salads. Black beans, avocado, CORN! Eat them hot or cold, summer salads are what grilling out is all about!

Years ago my good friend, Ashley over at Wee Wander, gave me this recipe. I’m not sure if she concocted it because she’s and former chef and all, but either way, it’s amazing. It’s super simple and yet the flavors are unlike any other veggie summer salad (or corn salad for that matter) that I’ve ever tried. The secret? Apple cider vinegar.

Here’s the recipe and 21 Day Fix container breakdown, below!

INGREDIENTS

  • 5 ears of corn, shucked
  • 1/2 cup red onion, diced
  • 3 Tbsp. apple cider vinegar
  • 3 Tbsp. EVOO
  • 1/2 tsp. kosher salt
  • 1/2 tsp. black pepper
  • 1/2 tsp. basil (dried) or 1 Tbsp. chopped (fresh)

DIRECTIONS

Boil corn for 3 minutes. Remove and plunge into ice water to stop the corn from cooking. Remove kernels and toss all ingredients (except fresh basil) together in a bowl. Allow to marinate for several hours or overnight. Toss with fresh basil before serving.

21 Day Fix container breakdown:

1/2 cup = yellow

Gumbo!

Gumbo!

IMG_20160404_135839_226000.png

It’s that time of year when farm stands open up again and the access to really fresh fruits and veggies feels unlimited. Which is exactly why the hubs and I love to make this clean version of gumbo in the spring before it gets too hot to eat a bowl. *I’m not sure about you, but I can’t really get in the mood for a piping hot bowl of gumbo when it’s piping hot outside.)

This recipe is courtesy of my mother in law, who passed it down to us years ago. We absolutely love it because 1) it’s healthy and 2) because in spite of the laborious chopping and dicing involved, it yields a boatload of leftovers, which we always freeze in big batches and pull out during the fall and winter months when veggies like fresh, local okra are hard to come by.

I’ve also included what I think are the 21 Day Fix container breakdowns, below. Warning: don’t hold me to this precise measurement. The Beachbody nutritionist gods have not given their blessing on this breakdown so fair warning, it may not be 100% accurate but it is what I go by.

Here’s the awesome recipe for, y’all! Let me know what you think!

INGREDIENTS

  • 1/3 cup EVOO
  • 1/2 cup flour
  • 3 stalks celery, chopped
  • 2 cloves garlic, minced
  • 1 chopped green pepper
  • 20 okra, sliced
  • 1 chopped white onion
  • 3 large zuchinni, chopped
  • 2 14-oz. cans low-sodium chicken broth
  • 4 cups water
  • 1 14-0z. can crushed tomatoes
  • 1 lb. boneless, skinless chicken breasts, chopped into bite-size pieces
  • 1 lb. low-sodium turkey sausage, sliced and halved
  • 2 Tbsp. dried parsley
  • 1 tsp. dried thyme
  • 1 tsp. dried sage
  • 3/4 tsp. salt
  • 1/2 tsp. black pepper
  • 1 lb. frozen raw, shelled, deveined shrimp (optional)
  • Brown rice

DIRECTIONS

  1. Heat EVOO on medium in a heavy-bottomed put or cast-iron pot (like this one here). Heat until warm. Gradually stir in flour. Stir constantly for about 20 minutes until a rue is formed and mixture is very dark brown.
  2. Add all veggies and cook until tender.
  3. Gradually stir in chicken broth then add water.
  4. Add in seasonings and tomatoes. Bring to a boil.
  5. Simmer on low, uncovered, for 40 minutes.
  6. Last 5 minutes, add in shrimp and simmer for 5 minutes.
  7. Serve over brown rice.
  8. Add hot sauce, Sriracha, etc. Enjoy!

21 Day Fix container breakdown:

1 serving = 2 cups gumbo over 1/2 cup brown rice

1 red, 1 green, 1 yellow, 1 tsp.


Honey Mustard-Glazed Chicken Bake!

Honey Mustard-Glazed Chicken Bake!

IMG_20160330_150541_422000

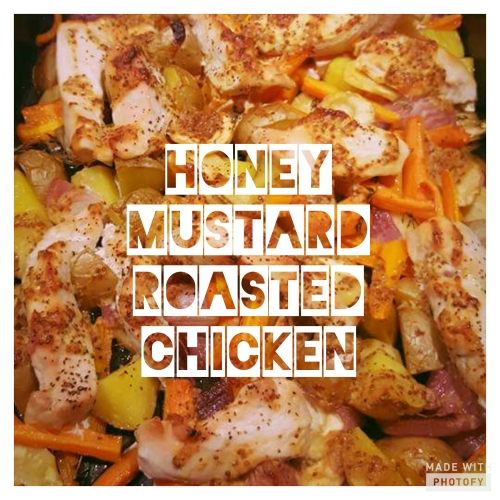
Ok, there’s a recurring theme on my blog here: easy, clean, and kid friendly. That about covers it. (Even bigger bonus if it’s 21 Day Fix approved, too! Luckily, I’d say 99.9% of the recipes I pots on here are, in fact, Fix approved! Yay!)

So it would make perfect sense that this here honey mustard-glazed chicken bake is also easy, clean, and kid friendly. Oh, and is it ever delish, too!

I pulled this recipe out of the February issue of Good Housekeeping since I am always on the lookout for recipes that are either a) clean or b) I can make clean. This is one of them. The original recipe calls for chicken thighs and drumsticks but I don’t like eating meat off a bone (I know, it’s a weird little idiosyncrasy I have) and dark meat, while it’s more moist in recipes like this, has more calories and isn’t as “clean.” Plus, those other two cuts of chicken have skin, which is where the big time calories (and not-so-clean factor) come into play.

So I switched things up a bit and used boneless, skinless chicken breasts and I gotta say, I was shocked at just how awesome this turned out! The bonus is that it’s a) 21 Day Fix approved! And b) it was kid friendly! My four year old couldn’t stop eating the parsnips and my 17 month old was hoovering the carrots! Score for Mom!

Here’s the recipe!

Serves 4

INGREDIENTS

  • 1 lb. parsnips, sliced on an angle
  • 1 lb. Yukon Gold potatoes, scrubbed and quartered
  • 1/2 lb. carrots, quartered lengthwise, then cut into 2″ pieces
  • 1 medium red onion, cut into 8 wedges
  • 2 tbsp. olive oil
  • 5 sprigs fresh thyme
  • 1 1/2 lbs. boneless, skinless chicken breasts cut into 1-inch long tenderloins
  • 3 tbsp. Dijon mustard
  • 2 tbsp. whole-grain mustard
  • 2 tbsp. honey
  • 1 tbsp. brown sugar

DIRECTIONS

  1. Preheat oven to 425 degrees F. In large roasting pan, toss parsnips, potatoes, carrots, onion, oil, thyme and 1/2 teaspoon salt. Roast 15 minutes.
  2. Place chicken in single layer over vegetables. Sprinkle with 1/2 teaspoon salt and 1/4 teaspoon pepper. Roast 15 minutes.
  3. In medium bowl, whisk Dijon mustard, whole-grain mustard, honey and brown sugar. Drizzle all over chicken and vegetables. Roast 25 minutes or until chicken is cooked (165 degrees F) and vegetables are tender. Serve chicken with vegetables.

21 Day Fix container breakdown:

3 pieces of chicken = 1 red; 1 yellow; 1/2 green (I actually measure out each one by separating the carrots (green) from the parsnips and potatoes (both yellow)

DELISH Crock Pot Pulled Pork Tacos!

DELISH Crock Pot Pulled Pork Tacos!

pulled pork

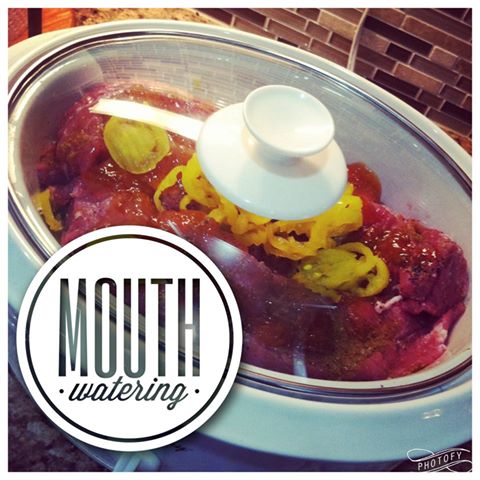
I like easy. As in, throw it in a big Crock Pot, turn it on high, and let the flavors simmer together to create a meal that’s so delicious you’ll be licking your plate when you’re done. That’s my kinda meal. Especially as my littles get older and we’re racing from practice A to practice B to play date C. (Side note: I have officially become a soccer mom.)

So these pulled pork tacos from the 2006 issue of Real Simple have been in my dinner rotation long before kids ever came into the picture. Why? Because of all the reasons I listed, above. And now with kids and eating super clean on an every day basis, this is exactly what I need in my dinner life. Did I mention it also leaves you with amazing leftovers that taste even better on day 2?

The perks of this meal: my four year old LOVES them and it fits my clean eating lifestyle. Score!

Without further ado, here’s the kick-butt recipe, below, plus 21 Day Fix container breakdown!

Serves 6

INGREDIENTS

  • 2 to 2 1/2 pounds boneless pork loin (I’ve also made this with 3 boneless chicken breasts!)
  • teaspoons kosher salt
  • teaspoon black pepper
  • teaspoons ground cumin
  • 1/2 cup apricot jam or preserves
  • 2 large jars mild banana peppers (I like to use Mt. Olive brand)
  • red onion, roughly chopped
  • small flour or corn tortillas, warmed

DIRECTIONS

  1. Heat Crock Pot to low. Season on all sides of the pork loin with the salt, pepper, and cumin. Spoon the jam over the pork, turning to coat. Scatter the banana peppers and onion around the pork. Cook on low for 8 hours.
  2. Shred pork in the Crock Pot and mix up with all of the juices. Transfer to a bowl.
  3. Serve with the tortillas. Cilantro and lime wedges are optional, but I don’t serve the tacos with them. There’s so much flavor it truly doesn’t need anything else.

21 Day Fix container breakdown:

1 yellow (two corn tortillas), 1 red, 1/2 green

Maple-Sweetened Pumpkin Muffins!

Maple-Sweetened Pumpkin Muffins!

IMG_3407

I love pumpkin anything, Pumpkin soup. Pumpkin cheesecake. Pumpkin coffee. And, yes, pumpkin muffins. But like with any indulgences, there are lots of calories, lots of sugar, and lots of fat.

Sigh. Why can’t eating good stuff be healthy for us?

Guess what? It can be! I pinned this yummy recipe awhile ago from Cookie + Kate, a blog all about eating whole foods. And I finally got around to making these maple-sweetened pumpkin muffins this past week when my four year old was begging to bake with me.

And, let me tell you, we were not disappointed! Moist, flavorful, DELICIOUS!

Here’s the recipe:

INGREDIENTS

  • ⅓ cup melted coconut oil or extra-virgin olive oil
  • ½ cup maple syrup or honey
  • 2 eggs*, at room temperature
  • 1 cup pumpkin purée
  • ¼ cup milk of choice (I used almond milk)
  • 1 teaspoon baking soda
  • 1 teaspoon vanilla extract
  • ½ teaspoon salt
  • ½ teaspoon cinnamon, plus more for sprinkling on top
  • ½ teaspoon ground ginger
  • ¼ teaspoon nutmeg
  • ¼ teaspoon allspice or cloves
  • 1¾ cups whole wheat pastry flour or regular whole wheat flour
  • ⅓ cup old-fashioned oats, plus more for sprinkling on top

DIRECTIONS

  1. Preheat oven to 325 degrees Fahrenheit. If necessary, grease ten cups of your muffin tin with butter or non-stick cooking spray (my pan is non-stick and didn’t require any grease).
  2. In a large bowl, beat the oil and maple syrup or honey together with a whisk. Add eggs, and beat well. Mix in the pumpkin purée and milk, followed by the baking soda, vanilla extract, salt, cinnamon, ginger, nutmeg and allspice or cloves.
  3. Add the flour and oats to the bowl and mix with a large spoon, just until combined. If you’d like to add any additional mix-ins, like nuts, chocolate or dried fruit, fold them in now.
  4. Divide the batter evenly between the ten muffin cups. For these muffins, it’s ok to fill the cups a little higher than you normally would. Sprinkle the tops of the muffins with a small amount of oats, followed by a sprinkle of cinnamon. Bake muffins for 23 to 26 minutes, or until a toothpick inserted into a muffin comes out clean. Place the muffin tin on a cooling rack. These muffins are delicate until they cool down (you have been warned!), so it’s best to wait until they have cooled down to remove them from the tin. You might need to run a butter knife along the outer edge of the muffins to loosen them from the pan. Enjoy muffins as is or with a spread of nut butter or regular
Meatballs!!

Meatballs!!

meatballs

I LOVE meatballs. I love when they’re browned ever so slightly on the outside to lock in the delicious, moist meat on the inside then baked to perfection so that when you bite into one, it literally melts in your mouth.

Yeah, I daydream about meatballs. You know what else? My waistline can’t afford to eat said meatballs all that often because of the amount of fat and calories loaded in ONE of those little bad boys. So, alas, I had to find a clean version that not only tasted just as wonderful as the ones packed with fat and oil, but were also just as easy.

Guess what? I found it! Even better? They’re 21 Day Fix approved!

Here’s the recipe:

One serving is 2 meatballs

INGREDIENTS

1 1/4 pounds ground chicken
1/2 cup breadcrumbs
2 tablespoons chopped onion
1 tablespoon chopped parsley
1/2 cup Pecorino (or Parmesan)
salt to taste
pepper to taste
1 clove garlic, minced
1 teaspoon fennel seeds
1 egg, whisked
zest of half a lemon
3 tablespoons olive oil
1 14-ounce can store-bought pizza sauce
About 4 ounces fresh mozzarella (I use shredded but slices would actually be a good option, too)

DIRECTIONS

Preheat oven to 400°F, setting rack to upper third part of oven. In a large bowl, using your hands, gently mix together first 11 ingredients. Shape into lacrosse-ball size balls (that would be somewhere between golf and tennis) and place a few inches from each other on a sprayed, foil-lined baking sheet. In a small bowl, mix one spoonful of your pizza sauce with olive oil. Brush this mixture on top of each meatball. Bake for 15 minutes.

Remove meatballs from oven, spoon some sauce on top of each meatball, and cover each with a slice of cheese. Broil another 3 to 5 minutes until cheese is bubbly and golden. Heat remaining sauce in a small saucepan.

21 Day Fix container breakdown per serving:

1 red 1/3 yellow 1/2 to 1 blue

Recipe courtesy of Dinner: A Love Story

Beef Chorizo Tacos with Cabbage Slaw!

Beef Chorizo Tacos with Cabbage Slaw!

chorizo
These yummy (and kid-friendly!) beef chorizo tacos are 21 Day Fix approved!

I love tacos. I also love anything that’s clean eating AND kid friendly. (Hey, when you’re a mom of an almost four year old, the things you love these days are pretty simple.) I came across this recipe in All You magazine and decided to give it a whirl. And wow. SO good. AND 21 Day Fix and 21 Day Fix Extreme approved! Score!

Best of all? I was able to cook the meat and prepare the salad ahead of time so that we could easily just heat up the meat and corn tortillas and sit down quick to eat! Plus, all of the clean up was done!

Here’s the recipe, which I tweaked just a bit because I felt the slaw needed a little more tang:

One Serving includes 2 tortillas

INGREDIENTS

4 cups very thinly sliced red cabbage
1/3 cup cilantro leaves
4 tablespoons white vinegar, divided
3 tablespoons olive oil, divided
3/4 teaspoon salt, divided
1 tablespoon paprika
2 teaspoons ground cumin
1/2 teaspoon black pepper
5 garlic cloves, finely chopped
1 pound 90% lean ground sirloin (I used lean ground beef but you could also use lean ground chicken or lean ground turkey, too)
12 (6-inch) corn tortillas

DIRECTIONS

1. Combine cabbage and cilantro in a medium bowl.

2. Combine 2 tablespoons vinegar, 1 tablespoon oil, and 1/4 teaspoon salt in a small bowl, stirring with a fork or whisk.

3. Drizzle vinegar ­mixture over cabbage mixture; toss well to combine. Set aside.

4. Combine remaining 2 tablespoons vinegar, remaining 2 tablespoons oil, remaining 1/2 teaspoon salt, paprika, cumin, pepper, and garlic, stirring well with a fork or whisk.

5. Heat a large nonstick ­skillet over ­medium-high heat. Add beef; cook 5 minutes or until browned and done, stirring to crumble.

6. Stir in vinegar-spice mixture; cook 2 minutes or until liquid almost evaporates.

7. Heat tortillas over medium-high heat directly on the eye of a gas or electric burner or in a skillet for about 10 ­seconds on each side or until lightly charred.

8. Spoon about 1/4 cup beef mixture and 1/4 cup slaw into each tortilla.

21 Day Fix container breakdown per serving:

1 red, 1 yellow, 1/2 green

FIXATE is HERE!

FIXATE is HERE!

FIXATE
Autumn’s cookbook, FIXATE, is finally here! Find 101 Fix-approved and clean eating recipes all in one place!

Are you sick of wondering whether a recipe is clean or not? Well, you don’t have to question anymore. Autumn Calabrese, the body and brains behind ‪‎21 Day Fix and 21 Day Fix Extreme‬, aka the program that got me to my pre-pregnancy weight at just 4 months postpartum, released her cookbook, FIXATE, today!

It features 101 ‪#‎cleaneating‬ recipes! From ice cream–yes, ice cream!–to pancakes to tacos to chips to deliciously good chicken and MORE–you’ll find family-friendly options for everyone, even the pickiest of eaters!

Comment, below, if you plan on ordering one for yourself and family to try! Mine is already ordered!